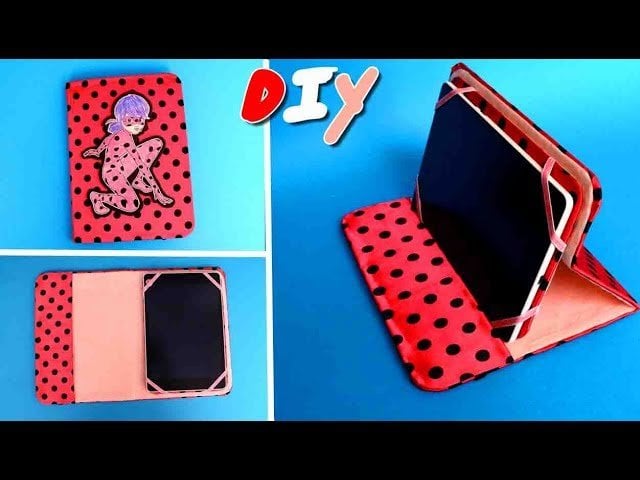
If you are tired of carrying around your electronics without a proper place to store them, keep reading to reveal how to create a protective case out of fabric.
In this post, we will create a case for a Tablet with dimensions of 6 inches and 7 inches. Depending on your Tablet size, you need to measure the dimensions with extreme precision for optimal results.
We will provide you with all the essential steps and tips that you need to know on how to make a custom tablet case out of fabric.
To be honest, there are loads of measuring and a lot of cutting involved so it might take a while and a couple of tries until you get it right.
You will certainly need a sewing machine but once it all comes together you will love it. It might not look professional, but it is an amazing feeling to see something that you’ve made to perform better than expected.
This method applies to any wide-screen device so without further ado, here is how to make a tablet case out of fabric.

3 Simple Steps to Make a Tablet Case Using Fabrics
Step 1: Preparation
Besides the fabric, before everything else you need to gather all materials, you will need to assemble the case. Make sure that you have 2 half yards of fabric, 1 half yard of cotton batting, a rope trim, a button, and a coordinating thread. The dimensions of the fabric should fit the Tablet model size perfectly. Instead of measuring, where you can easily make a mistake, find your Tablet online and check its dimension sizes, not the screen size!
Step 2: Measuring & Cutting
Once you have the dimensions add ½ an inch as an allowance, then cut all of your pieces.
For example, with dimensions of 6 inches and 7 inches, we have six pieces of fabric in total. Two inner, two outer, and two batting pieces song with two pieces of 6 x 7 inches for the pockets and last piece, again 6 x 7 inches for the bow.
Step 3: Process
To provide you with a detailed illustration, considering all possible issues that may occur, we’ve prepared a step-by-step process to help you create your own fabric case.
- Take the long piece of fabric for the bow and fold it in half and then sew the side down. (You know that you have it right if it looks like a long tube.) Then take a smaller piece of fabric, again, fold it in half, and sew down the long side. Now simply slide the long tube through the smaller piece of fabric (that you’ve lastly made) towards the middle and pinch the long piece to develop a bow.
- The pocket is optional but if you want one place the two pieces together and see all around the three sides. Leave the fourth side open so can easily flip the fabric inside out when necessary.
- The main pieces for the case place one inner and one outer piece right sides together and place the cotton batting on top, then sew all the way around the sides. Again on the fourth side leave a six-inch hole to flip the fabric right side out. Now it’s left to put a button for closure and measure the rope trip that will hold the button. Once ready sew it down and you should be able to seal the case.
- Lastly, gather all the pieces you’ve assembled from the above steps to finalize the Tablet case. Put the bow and the pocket on top of the outer pieces and then place the second main piece on top (remember to follow the pattern that should touch each other). Now just sew down the bottom and both long sides then cut off any excess pieces of fabric on the sides (there could be a lot). Flip the case inside out and then you can slide the tablet to see if it fits.
Bottom Line:
This method applies to any widescreen Tablet. The only difference would be the dimensions, which is the only thing that you should do on your own. If we exclude the sizing, with our method you just can’t go wrong, so we wish you a successful fabrication.